Plan for the prints you actually make
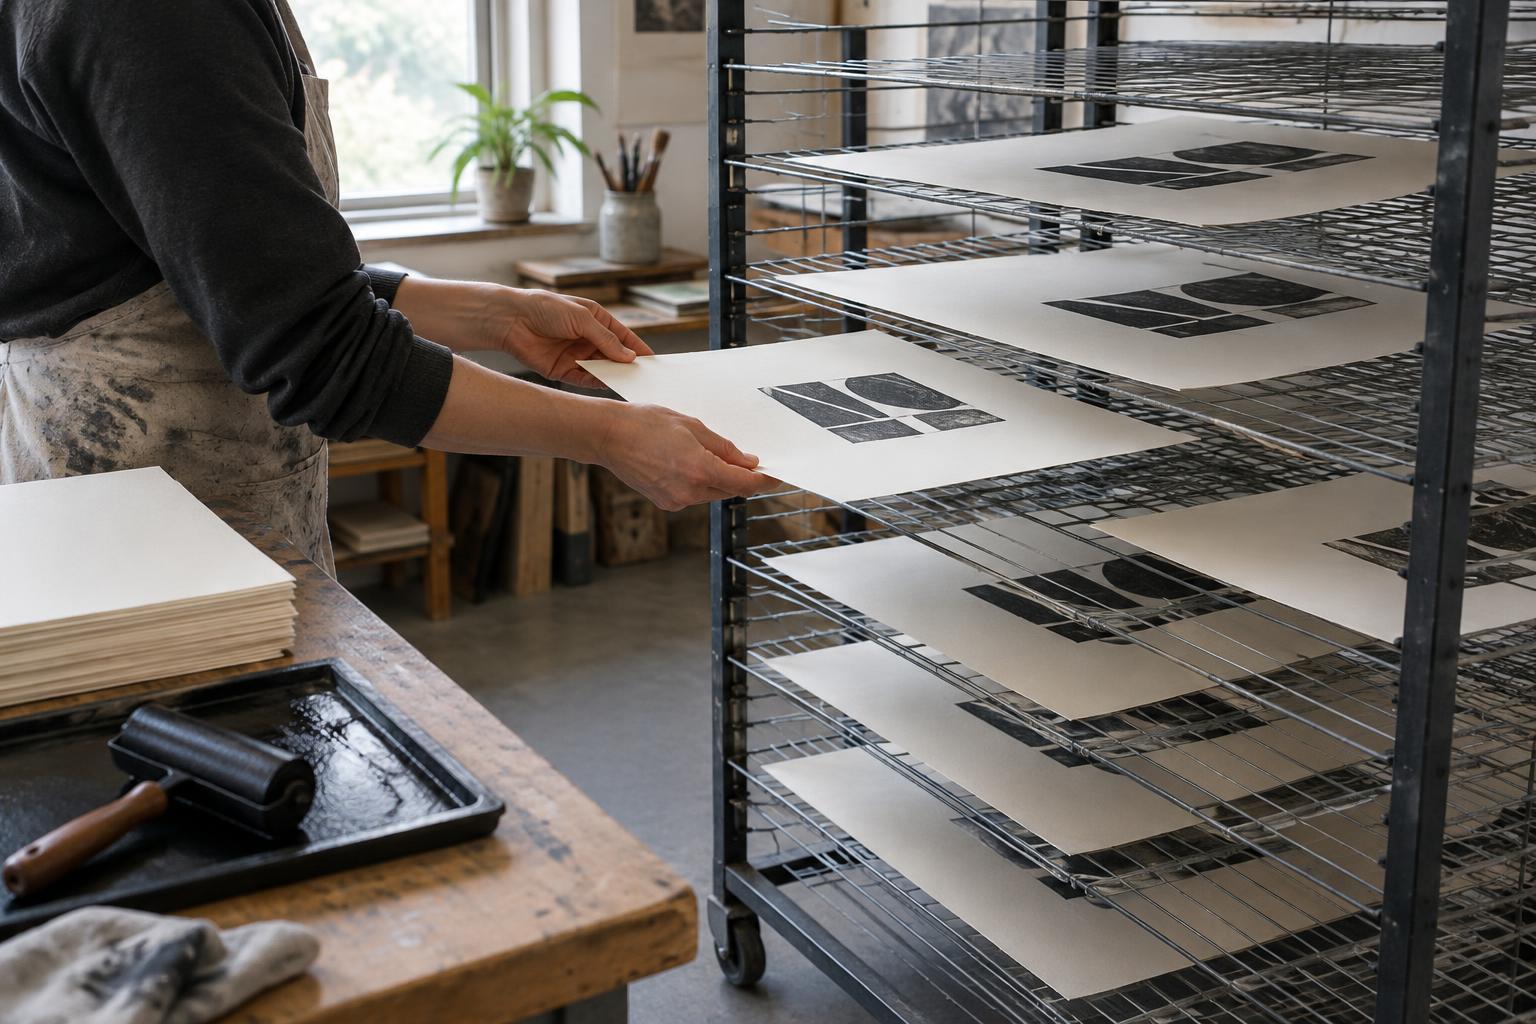
Before choosing a rack, measure your largest paper size, not just the image area. Each sheet needs support or clearance around its edges so it can be placed and removed without brushing another print. Think about how many sheets you may pull in one session, too. A rack with room for half an edition can still work if you have another clean drying surface, but it should not force you to stack wet prints.
Flat shelves are a straightforward choice for prints with generous ink coverage, delicate embossing or paper that curls easily. A hanging setup can save floor space, but clips may leave marks and a moving sheet can touch its neighbors. For a small studio, a clean table fitted with removable drying screens may be more useful than a large permanent rack. Whatever the style, test it with blank sheets first: you should be able to reach every position without bending a print sharply.
Choose a clean location with room to work
Place the rack close enough to the press or printing table that a fresh sheet has a short, clear journey. Leave space to approach it while holding paper with both hands. Avoid a route that passes over ink pots, wash-up areas or piles of tools. If the rack is on wheels, check that it stands steadily in its working position and cannot roll into your table.
Drying needs a reasonably clean environment and gentle air movement, rather than a strong draft aimed at the paper. Keep the rack away from open windows that admit dust, direct heat that may affect sheets unevenly and busy walkways where work could be bumped. Follow the ventilation and handling directions for the inks, modifiers and cleaning products you use. A rack helps keep prints separate; it is not a substitute for the precautions required by those materials.
Prepare surfaces and set the spacing
Inspect every shelf, screen or support before printing. Remove old tape, dried ink and loose fibers, then make sure the surfaces are dry. Smooth supports matter: a raised staple, rough edge or sagging mesh can mark damp paper. If you build a simple rack from shelving, choose stable materials that can carry the weight of the paper and allow you to lift each sheet without dragging it across the level above.
Set the gaps according to your work, not just the number of shelves you want to fit. There should be enough room for fingers or a clean support board to slide under a sheet. Heavily inked areas must not touch the level above, even if a corner curls. If you are unsure, use fewer levels for the first session and increase capacity only after seeing how your paper behaves. Keep scrap or test prints off the clean shelves so they do not become an accidental source of transferred ink.
Load prints in a repeatable sequence
Give the rack a consistent direction of use. For example, start at the top and move downward, or fill one side before the other. This makes it easier to find the oldest sheets without shuffling through wet work. Carry a print by clean margins where possible, supporting large or soft sheets with a clean board. Lay it down in one controlled movement rather than sliding it into place. If you use hanging clips, test their grip and placement on spare paper before committing an edition.
Leave visible space between sheets and keep the printed face clear of anything above it. A small label on the shelf or rack frame can record the project, paper and order of printing without touching the print itself. If you are pulling variants, mark the rack positions in your notes so you can match each dry sheet to its printing sequence. Wash or change inky gloves before handling fresh paper; a rack cannot protect a print from marks carried in on your hands.
Check dryness before clearing the rack
Drying time varies with ink, paper, coverage and studio conditions, so do not use the clock alone to decide when to stack prints. Check a margin or test sheet gently for tackiness, and be especially cautious with dense areas of ink. Water-based and oil-based materials can behave differently; consult the product guidance when deciding when prints are ready for further handling or packaging.
Once prints are ready, move them to clean, flat storage with suitable interleaving if needed. Clear the rack of dust and stray paper before the next session, and note any shelf that caused curling, contact or smudging. Those observations are more useful than adding capacity at all costs. A dependable drying rack is one you can load, inspect and empty without putting the prints you have just made at risk.