What a registration station needs to do
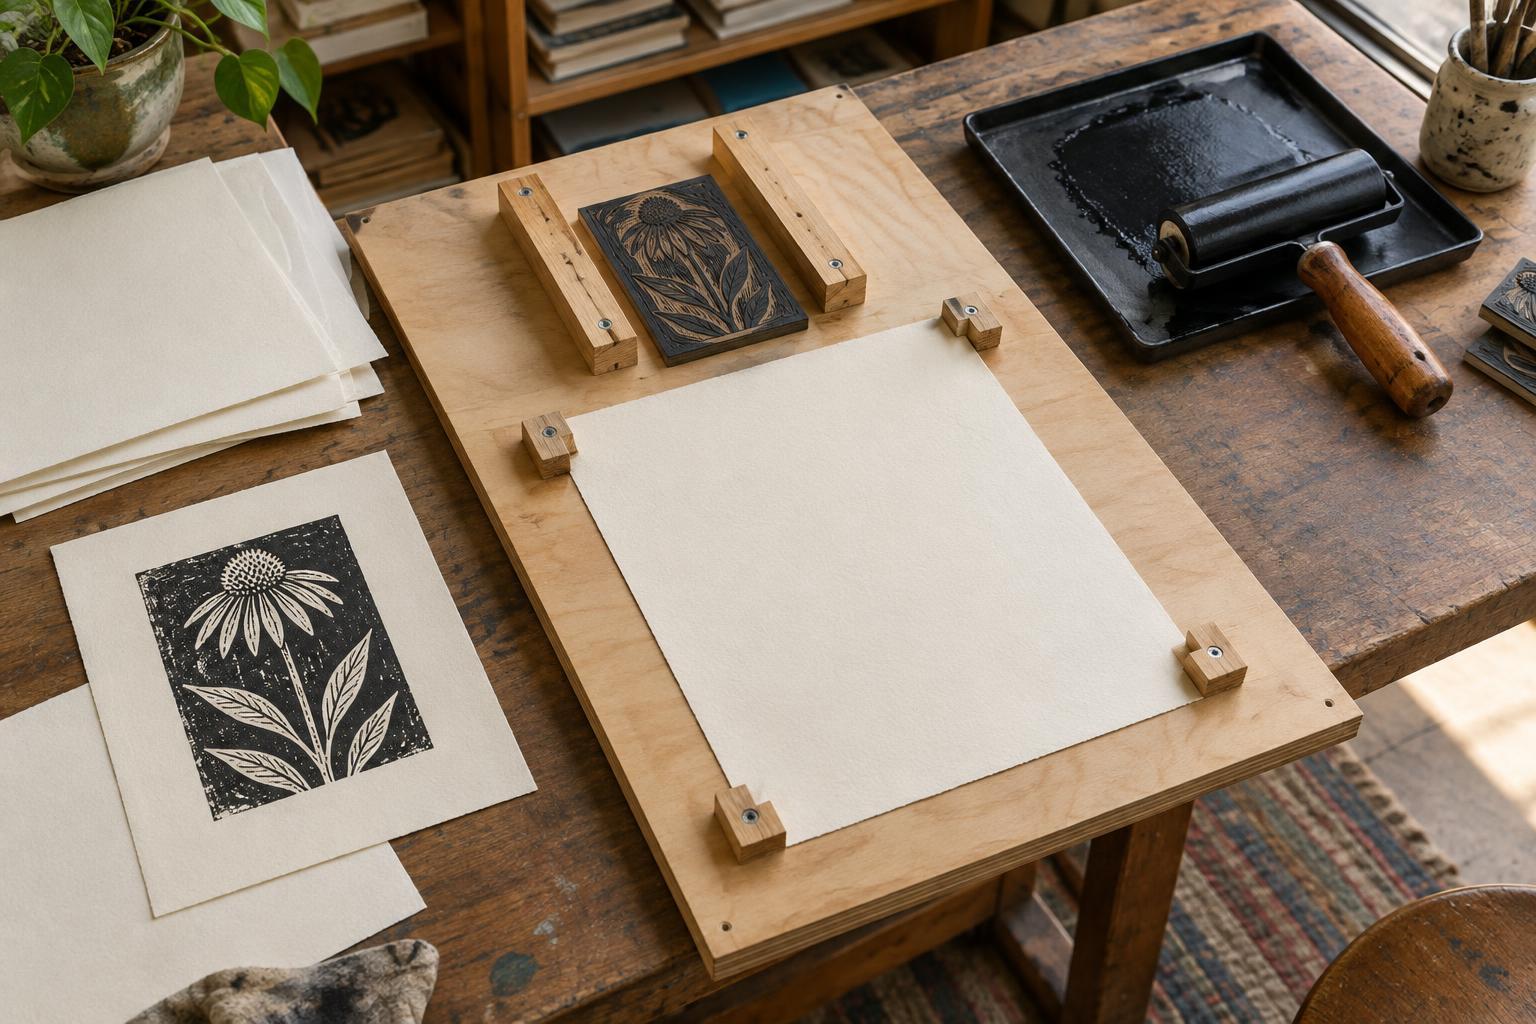
Registration is the process of placing each sheet in a consistent position relative to the printing block. It matters most when you print more than one color, but it also helps a single-color edition look consistent. A registration station does not need to be elaborate: a stable surface, a way to position the block and guides for the paper can be enough.
Begin by deciding what must stay fixed. If you ink a block and bring paper down onto it, the block needs a reliable position on the printing surface. If you place an inked block onto paper, the paper needs a reliable position instead. Pick one approach for the run rather than changing methods between impressions. Leave enough clear space around the setup to lift sheets without brushing them against the inked block.
Make a layout you can repeat
Place a larger backing sheet or board on your work surface and mark the intended position of the block. A shallow corner made from two securely attached strips can help you return the block to the same place, provided the strips do not interfere with printing pressure. Check that the block sits flat before adding paper guides. Use low-profile guides at the top and one side of the sheet so the paper can settle against them without buckling.
Choose one corner of every sheet as your reference corner, then keep the sheets in the same orientation throughout the run. Paper dimensions can vary slightly, especially when sheets are cut by hand; if precision is important, trim the stack consistently before setting the guides. Mark the backing sheet with a small arrow showing which edge is the top. If you are printing several colors, also mark the order of the blocks so a later session does not depend on memory.
Keep the layout simple enough to reset after inking or cleanup. You can mark guide positions on the backing sheet before attaching them and retain that sheet with the blocks. If tape secures any part of the station, check its hold periodically: a guide that shifts a little at a time can create an increasingly noticeable change across a run.
Test with proofs before committing to the edition
Run a dry test with an uninked block and a spare sheet. Lower the sheet using the same motion you plan to use while printing. Can you reach the guides easily? Does the paper curl or catch as you lift it? Adjust the station now, while changes are easy to make. A reference sheet with a lightly drawn image area can help you judge margins without using ink.
Next, pull a few inked proofs. For a multicolor print, compare the position of a later block with an earlier impression before printing a full batch. You can use a transparent overlay or a carefully marked proof to check how the layers meet. Look at several points across the image, not just one corner: a sheet may sit against the guides while the block itself is rotated slightly. Correct the source of the mismatch rather than trying to compensate differently on every print.
Keep at least one useful proof beside the station as a visual reference. It can show the intended orientation, margins and color relationship at a glance. Set aside sheets that reveal alignment problems, and note what changed before continuing. This small pause is usually easier than sorting an entire stack of uncertain prints afterward.
Maintain the setup through a print run
Feed each sheet into the guides in the same sequence: reference corner first, then the adjoining edge. Avoid pushing hard against the guides, which can bend paper or loosen the setup. Once the sheet is in position, lower or transfer it with a consistent motion. If you pause to adjust ink or pressure, check that neither the block nor the backing sheet has moved before resuming.
When working with dampened paper, test registration under the same paper conditions you intend to use for the edition. Changes in moisture can affect how a sheet handles and may affect its dimensions. Keep the prepared stack together, and avoid mixing sheets cut to different sizes without checking the guides again. If a guide starts to collect ink, clean or replace it before it marks the paper.
At the end of the session, photograph or sketch the complete layout for your own reference, then label the backing sheet with the block and paper orientation. Store loose guides with the corresponding blocks if you expect to print another color later. The goal is not a perfect piece of equipment; it is a setup you can understand, test and reproduce when you return to the work.